Componentized ES6 app development highlights for Angular 1 and Redux
Recently I was talking all things Front-End development (ES2015, Babel, JSPM, you name it), with a friend, specifically how we should structure his application in order to have a smooth migration to Angular 2 when time comes.
I had an application that heavily relied on the principles outlined by John Papa's Angular Style Guide, but was also using Redux (a Flux-like state manager library), had some important modifications, conventions, and tools; and throughout this article we will be describing most of them, some of the concepts might be new to you, some might not, feedback is always welcome that's why I encourage you to leave some on the comments section.
ES2015 all the way
JSPM is a package manager for JavaScript which integrates with the SystemJS module loader, transpilers and plugins. This is at the core of this project and enables proper modularization of components across the app.
It allows you to write code in the next version of JavaScript, have modular imports, modularize CSS as well (at least to an extent, I'm exploring new interesting projects such as this JSPM plugin, PostCSS and Stilr).
Let's talk app structure
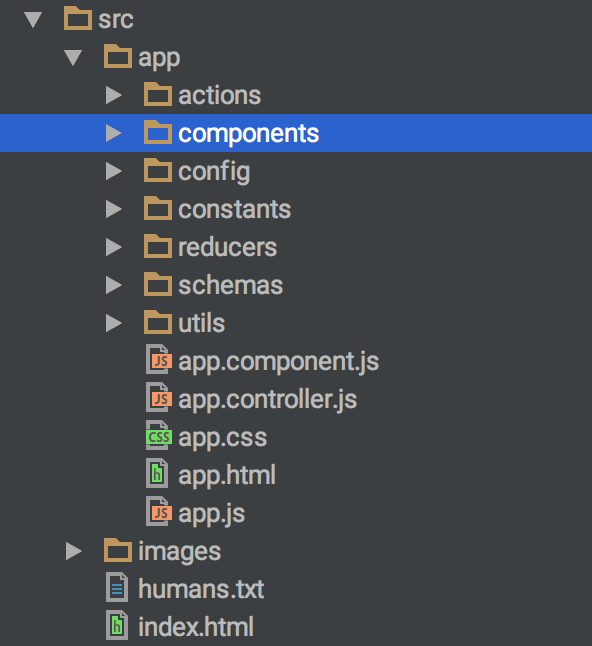
Let's focus on components first, since it's the least Redux/Flux-related and probably familiar to a lot of developers. I advocate structuring your directory structure per section of your application. There are many project seeds that do a competent job on getting you started but we won't be covering those in this article.
Let's focus on how a modularized component looks like (if you've been playing with Angular 2 you'll realize right away how this will smoothen the transition path).

TATFT
First thing to notice that I want to talk about boils down to this:

We mean it. Seriously, guys, bare with the PG-13, in a recent survey on front-end tooling it was found that 58% of the asked developers didn't test their Javascript at all, that's outrageous, and honestly we don't need surveys to infer that's more or less the case. Componentized development makes testing even easier, so we're running out of excuses 😆.
The Home module
This is the most Angular specific file, so let's take a look at it first.
import angular from "angular";
import "angular-ui-router";
import homeComponent from "./home.component";

let homeModule = angular
  .module("app.home", ["ui.router"])
  .config(($stateProvider, $urlRouterProvider) => {
    "ngInject";

    $urlRouterProvider.otherwise("/");
    $stateProvider.state("home", {
      url: "/",
      template: "<home></home>"
    });
  })
  .directive("home", homeComponent);

export default homeModule;
This declares a ES6 module that itself registers a familiar Angular 1 module (we
won't need this on Angular 2), and it uses the recommended at-least-one-dot for
its name. It declares the route to this particular page within itself (no giant
routes definition anywhere), and the POJO-like components that compose it
(directives, services, factories) are registered with Angular. Think of it as an
index for how our component will look like. Interesting here is that our
template is just
<home></home>Some people like this approach, others think it's way over the top (this talks web components but the custom elements section is applicable, since directives could be seen as such, anyhow I highly recommend you to watch this presentation). The main benefits I see is encapsulation, also that you have an easier way to pass scope items down the chain, and it gives you a CSS namespace for free. Since there's no notion of Shadow DOM or similar (Shady DOM, Polymer I'm looking at you), this gives us a simulation of scoped styles.
The Home component
Essentially, all the previous file does it register our component with Angular, let's look at our component itself.
import controller from "./home.controller";
import template from "./home.html!text";
import "./home.css!";

let homeComponent = function() {
  return {
    template,
    controller,
    restrict: "E",
    controllerAs: "vm",
    scope: {},
    bindToController: true
  };
};

export default homeComponent;
Pretty simple, right? We just return the standard DDO, after importing our
controller and template. Modularized development allows us not only to have our
controller in a separate file, but also import our template and styles via JSPM,
so it's all contained (in a way, JSPM's CSS injects <style> tags so you
wouldn't get scoped CSS as I mentioned before).
One thing I need to come back to, always use controllerAs syntax in your
controllers and directives (even dialogs, please), and prefer Element
directives.
The Home controller
The Home controller in this case is an empty class, since it doesn't do anything meaningful but display a home page. Instead of looking through it, I though it would be better to look at how a controller which uses DI would look like:
class SomeController {
  constructor($http) {
    "ngInject";
    this.http = $http;
    // ...
  }
}
We're using ng-annotate here, you could
also use a static $inject or any of the other methods. Pro tip: always run
your app under
strictDI
so you spot issues before they reach production.
Also, we're not really using $http since we've preferred the flexibility that
middleware on top of whatwg-fetch
gives us, but it serves as an example.
A sneak-peak into Redux
Originally I was going to include everything about Redux/Flux on this app in this article, but starting to redact it made me realize that it deserves an article of its own, even with an introduction and pitfalls, since most Angular developers wouldn't be familiar with Flux to begin with (I'm also starting with it), not to mention Redux, so we'll only take a small peak at the directory structure and what we're using here.
Let's start by saying that we connect our top-level controllers with the help of
ng-redux and we follow a similar
approach of Smart and Dumb
components
where top-level components are subscribed to state changes (only one in my case)
and other components trigger state changes via bound functions and receive state
changes via $scope properties.
.
├── actions
├── constants
├── reducers
│   ├── middleware
├── schemas
└── utils- actions: FSA actions describing all the actions of our app.
- constants: Constants for both our actions and section-specific constants.
- reducers: Redux reducers, including an entity reducer (see below).
- reducers/middleware: Middleware for our reducers, global error handlers, etc, including imports for redux-thunk and redux-promise.
- schemas: normalizr schemas to be applied to our API responses.
- utils: API call helpers, authentication, etc.
Our entities reducers relies on FSA conventions, and would merge objects into a single canonical representation, like you can see below:
import merge from 'lodash/object/merge';
const initialState = {
  threads:  {}
  profiles: {}
};

function entities(state = initialState, action) {
  if (action.payload && action.payload.entities) {
    return merge({}, state, action.payload.entities);
  }

  return state;
}

export default entities;
Bonus: A material design global error handler as middleware
This is certainly not production ready, but I thought to end this article by showing you something fun. I'm using Angular Material on this app, and we're going to code a global error handler that shows a toast whenever an error occurs in one of the actions. This showcases the power of Flux, conventions and Redux's middleware. This one serves as the base for our optimistic updates as well.
If anything, you could learn some Angular tricks didn't know existed right there 😁.
let errorMiddleware = store => next => action => {
  if (action.error) {
    let toast = angular
      .element(document.querySelector("app"))
      .injector()
      .get("$mdToast");

    toast.show(
      toast
        .build()
        .template(
          `<md-toast md-theme="{{toast.theme}}">
          <span flex><md-icon>error</md-icon>Error: ${action.payload.message}
          </span>
         </md-toast>`
        )
        .position("bottom left")
    );
  }

  return next(action);
};

export default errorMiddleware;
Conclusion
I think it's enough for this article. Let me know if you learned anything, whether you have some feedback, and if this article was useful. Stay tuned for next article on all-things-Redux.